Tuesday, 4 November 2014


How to change a product dropdown attribute to a multiselect in Magento


First, update the attribute input type to multiselect


UPDATE eav_attribute SET
entity_type_id = '4',
attribute_model = NULL,
backend_model = 'eav/entity_attribute_backend_array',
backend_type = 'varchar',
backend_table = NULL,
frontend_model = NULL,
frontend_input = 'multiselect',
frontend_class = NULL
WHERE attribute_id = 'YOUR_ATTRIBUTE_ID_HERE'


Next, copy the attribute values from the old table to the new:


INSERT INTO catalog_product_entity_varchar ( entity_type_id, attribute_id, store_id, entity_id, value)
SELECT entity_type_id, attribute_id, store_id, entity_id, value
FROM catalog_product_entity_int
WHERE attribute_id = YOUR_ATTRIBUTE_ID_HERE;

Finally, remove the old values or they will conflict with the new setup (the old values will load, but Magento will save new values to the varchar table):


DELETE FROM catalog_product_entity_int
WHERE entity_type_id = 4 and attribute_id = YOUR_ATTRIBUTE_ID_HERE;


Thursday, 5 June 2014

.htaccess URL rewriting adivce - remove text from url [closed]

Options +FollowSymLinks -MultiViews
# Turn mod_rewrite on
RewriteEngine On
RewriteBase /

RewriteCond %{HTTP_HOST} ^(www\.)?zzz\.com$ [NC]
RewriteRule ^article/(.*) /$1 [L,NC]

PS: If you want external redirection then use:

RewriteCond %{HTTP_HOST} ^(www\.)?zzz\.com$ [NC]
RewriteRule ^article/(.*) /$1 [L,NC,R]

Thursday, 20 March 2014

Redirect an Old Domain to your New Website

Redirect an Old Domain to your New Website

How to instructions using a 301 redirect and mod_rewrite

Simply enter the following code into your .htaccess file (changing the addresses in the examples below as needed) and save the changes. If there are several individual pages which have moved, just repeat as neccesary. Not sure how to access or change or .htaccess file. Read our .htaccess guide here.
 

Method 1:

Options +FollowSymlinks
RewriteEngine On
RewriteCond %{HTTP_HOST} ^olddomain.com [NC]
RewriteRule ^(.*)$ http://newdomain.com/$1 [L,R=301]
RewriteCond %{HTTP_HOST} ^www.olddomain.com [NC]
RewriteRule ^(.*)$ http://newdomain.com/$1 [L,R=301]


Method 2:

Options +FollowSymlinks
RewriteEngine On
RewriteCond %{HTTP_HOST} \olddomain.com$
RewriteRule ^(.*)$ http://newdomain.com/$1 [R=301,L]

Method 3:

Options +FollowSymLinks
RewriteEngine on
RewriteRule (.*) http://www.newdomain.com/$1 [R=301,L]

Method 4:

Redirect 301 / http://www.newdomain.com/

Tuesday, 7 January 2014

How to remove all Custom option of all Products in Magento ...


In magento root folder create one custom folder with any name and create index.php file into the custom folder and run this line once

<?php
require_once '../app/Mage.php';
Mage::init();
Mage::getModel('catalog/product_option')->getCollection()->walk('delete');
?>

Sunday, 5 January 2014

Installing Yii Framework in XAMPP

Installing Yii Framework in XAMPP

Here I will discuss the details of the installation steps Yii Framework. But before, there are some you need to prepare to install Yii:
  • Yii Framework - Download at http://www.yiiframework.com/download/
  • Web and database Server, here I am using XAMPP - Download at http://www.apachefriends.org/en/xampp.html
  • Web Browser, here I use Mozilla Firefox - Download at http://www.mozilla.org/id/firefox/new/
After you download all, let's start installing yii. Here, I use windows 7 as the operating system.

1. Install XAMPP, here I did not explain how to install it, but just to be safe when the computer error and have to reinstall, it should be installed on a drive other than C, such as drive D, E, or others. Here I installed on drive D

2. Extract yii-x.x.x.xxxxx.tar.gz that you download, then change its name to yii, and to be more easily placed in the folder XAMPP / htdocs, so that such XAMPP / htdocs / yii.

3. Open the comand line by pressing ctrl + r and type cmd
Installing Yii Framework in Xampp
Yii Web Application
Microsoft Windows [Version 6.1.7600]
Copyright 2009 Microsoft Corporation. All rights reserved
C: \ Users \ santje>

4. Typed in the comand-line d:

Microsoft Windows [Version 6.1.7600]
Copyright 2009 Microsoft Corporation. All rights reserved
C: \ Users \ santje> d:
D: \>

5. Typing again cd xampp

Microsoft Windows [Version 6.1.7600]
Copyright 2009 Microsoft Corporation. All rights reserved
C: \ Users \ santje> d:
D: \> cd xampp
D: \ xampp>

6. After that typing cd php

Microsoft Windows [Version 6.1.7600]
Copyright 2009 Microsoft Corporation. All rights reserved
C: \ Users \ santje> d:
D: \> cd xampp
D: \ xampp> cd php
D: \ xampp \ php>

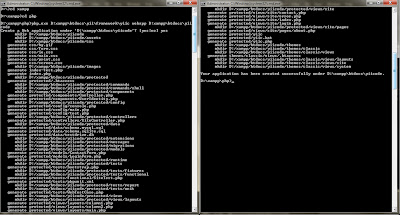
7. Typing again php.exe D:\ xampp\ htdocs\ yii\framework\yiic webapp D:\xampp\htdocs\yiicode
Description: D: \ xampp \ htdocs \ yiicode means the application will be installed on xampp - htdocs, while yiicode is the name of my application to be made

Microsoft Windows [Version 6.1.7600]
Copyright 2009 Microsoft Corporation. All rights reserved
C: \ Users \ santje> d:
D: \> cd xampp
D: \ xampp> cd php
D: \ xampp \ php>
D: \ xampp \ php> php.exe D:\ xampp\yii\ framework\yiic\ webapp D:\xampp\ htdocs\ yiicode
Create a Web application under 'D: \ xampp \ htdocs \ yiicode'? [yes: no]

5. The last typed yes and enter.
Your application has been succesfully created under D: \ xampp \ htdocs \ yiicode

6. Open xampp-control.exe click the start button on the Apache and MySQL, and then open your web browser and type localhost / yiicode. Congratulations you have successfully created your first application yii